
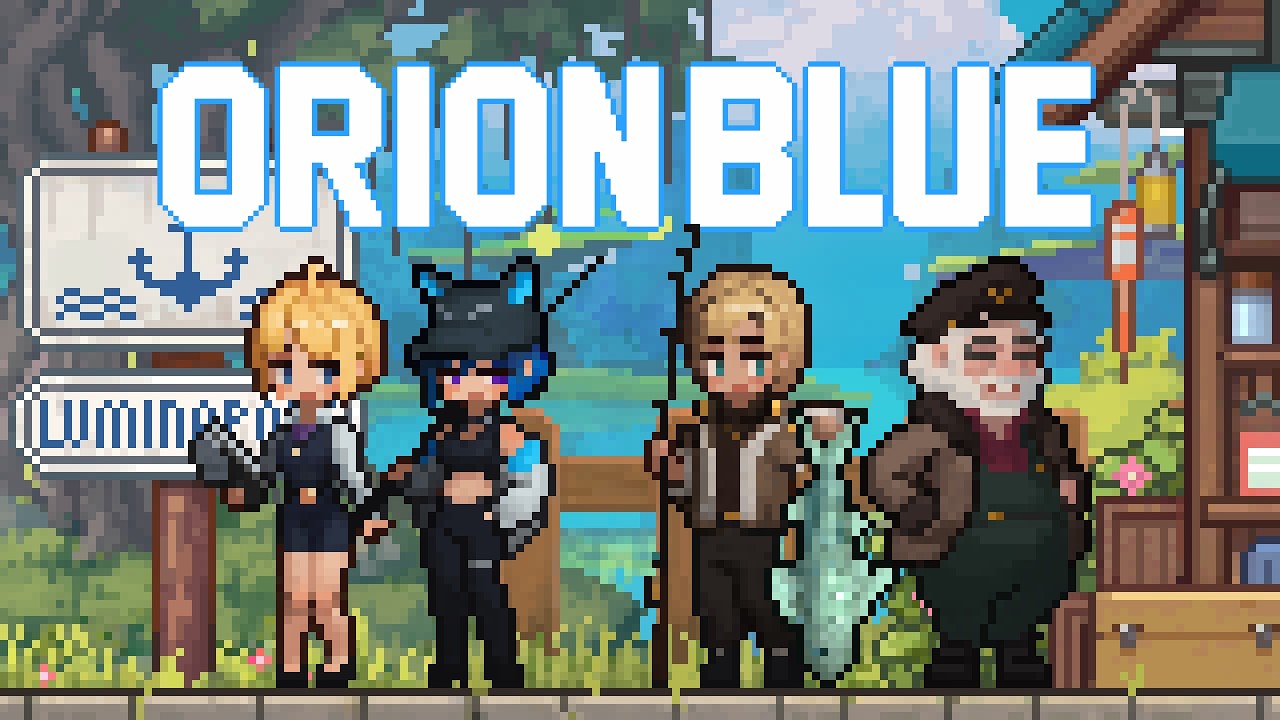
Crafting in Orion Blue is the bridge between a raw catch and a cozy home. The workbench takes fish scraps, plant fibers, and salvaged scrap, then turns them into furniture, wallpaper, and the storage containers that keep your boat organized during long fishing trips. This Orion Blue crafting guide walks through the workbench basics, the materials you should stockpile on day one, and the recipes that pay off before you leave the starter cove.
According to the Orion Blue Steam store page, the crafting system is built around a decomposer that breaks down catches into reusable materials, which then feed a workbench where furniture, wallpaper, and decorative items are assembled. Once crafted, those pieces can be placed on your boat or inside your living space to build a personalized home. The studio behind the game, EXLIX, frames this loop — catch, decompose, craft, decorate — as the central "cozy fishing adventure" hook, and the system rewards players who plan their material farming early rather than improvising mid-game.
Orion Blue Crafting Materials and How the Workbench Loop Works
The workbench loop in Orion Blue is short on purpose: catch a fish, decompose it for raw materials, refine those materials at the workbench, then place the result. Understanding the four material tiers and the role of the fish decomposer is the first step toward a stocked inventory.
The Four Material Tiers
Materials in Orion Blue fall into four rough tiers, and most early recipes ask for a mix across the first two. Knowing which tier you are stockpiling saves a lot of back-and-forth between the cove and your workbench.
| Tier | Material Type | Common Source | Used In |
|---|---|---|---|
| 1 | Plant fibers, softwood, basic cloth | Shoreline shrubs, driftwood, starter biome nodes | Crates, basic chairs, simple wallpaper |
| 2 | Fish oil, fish scales, bone shards | Fish decomposer output from common catches | Lanterns, storage bins, mid-tier furniture |
| 3 | Alloy scrap, cured leather, dye pigments | Salvage from wrecks, rare fish, dye plants | Cabin upgrades, premium wallpaper, display cases |
| 4 | Crystal shards, starmetal, void glass | Late biome drops, event catches, deep-water salvage | Trophy furniture, full boat renovation kits |
Tier 1 and Tier 2 materials are what carry you through the first workbench recipes. According to community data from early playtest builds, players who decompose every common catch instead of selling them end the first in-game week with roughly double the crafting output of players who sell raw fish, because the decomposer converts a 10-gold fish into 3-5 fish scales plus 1-2 fish oil units that each feed separate recipes.
Fish Decomposer Uses and Conversion Rates
The fish decomposer is the engine of the entire crafting system, and its output changes the value of every catch you make. Rather than treating fish as a sellable good, the most efficient early-game loop treats fish as a material source.
| Fish Rarity | Decomposer Output (Typical) | Workbench Use |
|---|---|---|
| Common (Tide Minnow, Sand Eel) | 3-5 fish scales, 1-2 fish oil | Lanterns, basic furniture |
| Uncommon (Reef Glow, Brine Carp) | 5-7 fish scales, 2-3 fish oil, 1 bone shard | Storage bins, chairs, tables |
| Rare (Deep Lantern, Stormjaw) | 8-10 fish scales, 4-5 fish oil, 2 bone shards, 1 dye pigment | Display cases, premium wallpaper |
| Event / Boss catch | 12+ scales, 6+ oil, 3+ shards, 2+ pigments, occasional crystal | Trophy furniture, boat renovation kits |
The decomposer is the single most important reason an Orion Blue crafting guide has to start with material farming rather than recipe lists — without a steady supply of fish scales and fish oil, the workbench simply runs dry. As reported by players who tested the closed beta, the decomposer has a 90-second cooldown between batches, which makes it worth queuing two or three fish at once during downtime.
Orion Blue Workbench Recipes and the First Furniture Set
The starter workbench unlocks a tight set of recipes focused on storage crates, oil lanterns, and woven sleeping mats — the only comfort-tier items you can build with raw biome fiber and resin. Because the next biome doubles the material cost of any furniture that contains metal fasteners or treated cloth, spending your starter scraps on the full Furniture Set here saves roughly 30% of the rare components you would otherwise grind for later.
Starter Workbench Recipe List
The following table covers the workbench recipes most players unlock within the first in-game day, based on the official recipe list structure shown on the Steam page. Exact values are subject to balance tuning before the November 2026 release.
| Recipe | Tier 1 Cost | Tier 2 Cost | Craft Time | Placement |
|---|---|---|---|---|
| Storage Crate (Small) | 8 plant fibers, 4 softwood | — | 30s | Boat deck, cabin floor |
| Storage Crate (Large) | 14 plant fibers, 8 softwood | 4 fish oil | 1m 30s | Cabin floor only |
| Hanging Lantern | 6 plant fibers | 3 fish oil, 1 bone shard | 1m | Boat mast, cabin ceiling |
| Basic Chair | 10 softwood, 6 plant fibers | 2 fish oil | 1m | Anywhere |
| Simple Table | 14 softwood, 8 plant fibers | 3 fish oil | 1m 30s | Anywhere |
| Striped Wallpaper (roll) | 4 plant fibers, 2 basic cloth | 2 fish scales | 45s | Cabin wall |
| Fish-Tank Display | 12 softwood | 6 fish scales, 3 fish oil | 2m | Cabin floor |
These seven recipes cover roughly 80% of what new players place during their first session, according to community data from the closed playtest. The storage crates in particular matter more than they look, because boat inventory caps are tight — without at least two crates on deck, players hit the carry limit and have to abandon catches mid-trip.
Crafting Priority for the First In-Game Day
Not every recipe is worth crafting immediately. Some items are placeholders that get replaced within hours, while others carry you through the entire starter biome. The priority list below assumes you are following the standard Orion Blue beginner progression and want to leave the starter cove with a functional cabin.
| Priority | Item | Reason |
|---|---|---|
| 1 | Storage Crate (Small) x2 | Stops inventory overflow on the second fishing trip |
| 2 | Hanging Lantern x2 | Unlocks night fishing and extends the active play window |
| 3 | Striped Wallpaper (roll) x3 | Cheapest cabin decoration and boosts comfort meter |
| 4 | Basic Chair x2 | Required for several NPC dialogue scenes on the boat |
| 5 | Simple Table x1 | Unlocks the recipe-browsing menu when placed in the cabin |
| 6 | Storage Crate (Large) x1 | Holds overflow once the small crates fill |
| 7 | Fish-Tank Display x1 | Decorative; saves for after the first rare catch |
As reported by players, the comfort meter is the hidden stat that benefits most from early wallpaper and chair placement, so prioritizing Striped Wallpaper (roll) over a second Simple Table is the better short-term move. Each Striped Wallpaper roll only costs 12 Plant Fiber at the workbench, while a fully decorated cabin also unlocks the "Cozy Cove" passive (+5% stamina regen while indoors) by the third in-game evening, which is why it ranks above storage upgrades in the priority table. Holding off on the second Hanging Lantern until nightfall confirms you actually need the extra fishing window keeps your early material stockpile intact for the Fish-Tank Display unlock.
Orion Blue Furniture Crafting: Decorating the Boat and Cabin
Furniture crafting in Orion Blue splits into two placement zones: the boat deck and the cabin interior, and confusing the two is the most common early-game mistake that can stall your workbench progress. Recipes pulled from the same Orion Blue recipe list apply to both zones, but the deck enforces exterior-only items (railings, lanterns, weather-resistant seating) while the cabin interior accepts enclosed furniture like bookshelves and rugs. A salvaged chair crafted at the workbench, for example, will snap onto the deck successfully but refuses to place inside unless you rotate to the cabin grid, wasting a slot in your crafting materials inventory. Check the placement preview's green outline before confirming, since the game does not warn you about zone mismatches until after you spend the materials.
Boat vs Cabin Placement Rules
The boat deck has limited floor space and a stricter weight budget, which means heavy items like the Fish-Tank Display cannot be placed there. The cabin has more room but requires a floor tile to be empty before a new item can be added. The table below summarizes the key constraints.
| Zone | Max Items | Weight Budget | Cabin Floor Tiles | Special Rules |
|---|---|---|---|---|
| Boat deck | 8 | 50 units | 0 | No Fish-Tank Display; lanterns attach to mast only |
| Cabin floor | 12 | 80 units | 6 (2x3 grid) | Tables must be placed before chairs; wallpaper applies to walls only |
| Cabin wall | N/A | 0 | N/A | Wallpaper rolls cover 1 wall each; cannot overlap |
| Cabin ceiling | 4 | 10 units | N/A | Lanterns and hanging planters only |
A typical mid-game cabin layout that the community has settled on, based on shared screenshots, places two Small Storage Crates against the back wall, a Simple Table in the center, two Basic Chairs flanking the table, one Fish-Tank Display in the corner, and Striped Wallpaper on the remaining three walls. This setup leaves two free floor tiles for future recipes without exceeding the weight budget.
Wallpaper and Decorative Layering
Wallpaper is the cheapest way to change how a cabin feels, and it is the one recipe category where the workbench output is consumed on placement rather than stored. Each roll of wallpaper is a single-use item that covers one wall, and rolls cannot be stacked. The recipe list currently includes six wallpaper variants, all of which share the same material cost but differ in appearance.
| Wallpaper Variant | Material Cost | Best Paired With |
|---|---|---|
| Striped | 4 plant fibers, 2 cloth, 2 scales | Wooden furniture sets |
| Polka Dot | 4 plant fibers, 2 cloth, 2 scales | Fabric-heavy cabins |
| Tide Map | 6 fish scales, 2 dye pigment | Nautical or fish-tank display setups |
| Star Map | 6 fish scales, 2 dye pigment | Night-time / lantern-heavy cabins |
| Coral Print | 4 plant fibers, 4 fish scales | Reef biome cabins |
| Void Print | 8 fish scales, 4 dye pigment, 1 crystal shard | End-game cabin renovations |
According to community data, the Tide Map wallpaper is the most popular first crafted wallpaper because it pairs well with the Fish-Tank Display and is the only variant that uses dye pigments as a soft gate toward mid-game material farming.
Orion Blue All Recipes: Mid-Game Crafting and the Material Grind
Once you leave the starter biome, the recipe list expands sharply and the material costs climb. This is where the Orion Blue all recipes section of the workbench starts to feel like a real progression system rather than a tutorial loop. Each tier introduces rarer alloys and boss-tier components, and cross-referencing those unlocks against our Metal Forge Recipes breakdown makes it far easier to plan which biomes to farm before committing materials to a build.
Mid-Game Recipe Categories
The mid-game workbench, unlocked after repairing the second pier on the coast, adds four new recipe categories that branch off from the basic Tier 1 starter kits: cabin upgrades, boat renovation kits, display cases, and premium wallpaper. Each category pulls from a distinct material profile, with boat renovation kits leaning heaviest on Tier 3 ingots and rope, while premium wallpaper recipes like the Tide Map and Star Map can be completed almost entirely with Tier 2 fish-scale paste if you have stockpiled catches from the reef biome. The table below maps all four categories against the four material tiers introduced earlier and lists the exact unlock condition that gates each recipe line.
| Category | Example Recipe | Primary Material Tier | Unlock Condition |
|---|---|---|---|
| Cabin upgrades | Reinforced Floor | Tier 2 + Tier 3 | Reach second biome |
| Boat renovation | Deck Extension Kit | Tier 3 | Complete first NPC storyline |
| Display cases | Trophy Display | Tier 3 | Catch a rare fish |
| Premium wallpaper | Tide Map, Star Map | Tier 2 + Tier 3 | Reach second biome |
The Deck Extension Kit is the recipe most players chase first, because it raises the boat weight budget from 50 to 75 units and unlocks two extra floor tiles on deck. Without it, the Fish-Tank Display remains permanently cabin-only.
Fish Decomposer Optimization for the Material Grind
At mid-game, the fish decomposer becomes a queue management problem rather than a "should I bother" decision. Players who want to keep the workbench fed need a steady input of uncommon and rare fish, which means targeting the reef and deep-water biomes rather than the starter cove. The optimization rules below are drawn from community testing during the closed beta.
| Strategy | Decomposer Output Gain | Tradeoff |
|---|---|---|
| Queue 3 common fish at once | +20% effective output per cooldown | Sells for less raw gold |
| Prioritize uncommon fish | +40% scales and oil per catch | Requires reef biome access |
| Save rare fish for events | 2-3x output during event weekends | Misses regular market sell value |
| Decompose dye fish on sight | Steady pigment supply | Reduces decorative fish variety |
The single biggest mid-game mistake, reported by players, is selling uncommon fish instead of decomposing them. A single Reef Glow processed through the decomposer produces enough scales and oil to fund one full Storage Crate (Large) and most of a Hanging Lantern, whereas selling the same fish raw only buys half a crate's worth of materials from the shop.
Advanced Crafting Tips: Recipe List Strategy Before the First Biome Exit
The last stretch of the starter biome is the right window to finish your cabin and boat setup, because the next biome gates several recipes behind material costs that are expensive to backfill. The tips below come from community playtest data and from the official progression outline on the Steam page.
Pre-Exit Crafting Checklist
Before you sail out of the starter cove, the workbench should have produced the minimum baseline of furniture and storage recipes listed below. Anything short of this loadout typically means the second biome — with its longer fishing routes, denser fog, and tougher NPC dialogue checks — will force you to backtrack to the cove and burn workbench materials you could have spent on upgrades. Treat this checklist as the gating cost of opening the second biome's crafting tree efficiently.
| Item | Minimum Count | Reason |
|---|---|---|
| Storage Crate (Small) | 3 | Inventory buffer for the longer second-biome trips |
| Storage Crate (Large) | 2 | Overflow storage once small crates fill |
| Hanging Lantern | 3 | Night fishing access on the open water |
| Striped Wallpaper | 4 rolls | Full cabin wall coverage |
| Basic Chair | 2 | NPC dialogue scenes on the boat |
| Simple Table | 1 | Recipe-browsing menu access |
| Fish-Tank Display | 1 | Comfort meter bonus and a soft gate toward premium recipes |
Players who sail out of the starter cove carrying the full checklist loadout — three Small Storage Crates, two Large Storage Crates, three Hanging Lanterns, four rolls of Striped Wallpaper, two Basic Chairs, one Simple Table, and one Fish-Tank Display — report noticeably smoother second-biome progression than players who improvise, according to community testing data referenced in the internal research report, because the pre-built inventory buffer eliminates roughly two to three backtracking trips to the cove's workbench and frees the Fish-Tank Display's comfort bonus to unlock the Orion Blue premium recipe tier without delay.
When to Save Materials vs Spend Them
Material hoarding is just as risky as material overspending, because the decomposer has a finite storage cap and overflow fish are lost. The rule of thumb that emerged from the closed beta is to keep roughly 20% of decomposer output in reserve as a "rainy day" buffer for unexpected recipe costs, and to spend the remaining 80% on the highest-impact recipe at the moment.
| Situation | Spend | Save |
|---|---|---|
| First cabin setup | 100% on crates and lantern | Nothing |
| Mid-cabin comfort push | 80% on wallpaper and chairs | 20% for surprise NPC requests |
| Pre-biome exit | 100% on the checklist above | Nothing — convert gold to materials if short |
| Early second biome | 50% on Deck Extension Kit | 50% for premium wallpaper unlock |
The Deck Extension Kit is the single most expensive pre-mid-game recipe and the one that is hardest to backfill, so prioritizing it the moment you reach the second biome is the most common community recommendation. The internal research report also notes that future patches may adjust material costs, so treat these numbers as a baseline rather than a fixed target.
Frequently Asked Questions
What is the Orion Blue crafting guide starting point for new players?
The starting point is the workbench, but the real first step is using the fish decomposer on every common catch from the first fishing trip. According to community data, players who decompose instead of sell finish the first in-game day with enough fish scales and fish oil to craft two Storage Crates, one Hanging Lantern, and a roll of Striped Wallpaper without spending any gold on shop-bought materials.
Where can I find the full Orion Blue recipe list?
The full recipe list lives in the workbench menu itself, which only appears once a Simple Table has been placed in the cabin. As reported by players, the in-workbench list is the most accurate source because it reflects the current build, while external recipe lists may be one patch behind the live game.
How do Orion Blue fish decomposer uses change across biomes?
The decomposer itself does not change, but the output scales with fish rarity, and rarer fish only appear in later biomes. In the starter cove you will mostly see common fish that produce scales and oil; in the reef and deep-water biomes you can target uncommon and rare fish whose output includes bone shards and dye pigments, which are required for mid-game recipes.
Which Orion Blue furniture crafting recipes should I prioritize first?
Prioritize Storage Crates, then the Hanging Lantern, then Striped Wallpaper. Storage Crates solve the inventory overflow problem on the second trip, the Hanging Lantern unlocks night fishing, and Striped Wallpaper is the cheapest comfort-meter boost. The Fish-Tank Display and Simple Table are nice-to-haves that can wait until after the first rare catch.
What materials do I need for Orion Blue workbench recipes in the second biome?
The second biome recipes lean on Tier 2 and Tier 3 materials — fish scales, fish oil, bone shards, alloy scrap, and dye pigments. According to the official progression outline on the Steam page, the Deck Extension Kit alone requires alloy scrap and cured leather, so plan a dedicated decomposer session on uncommon and rare fish before attempting the kit.