
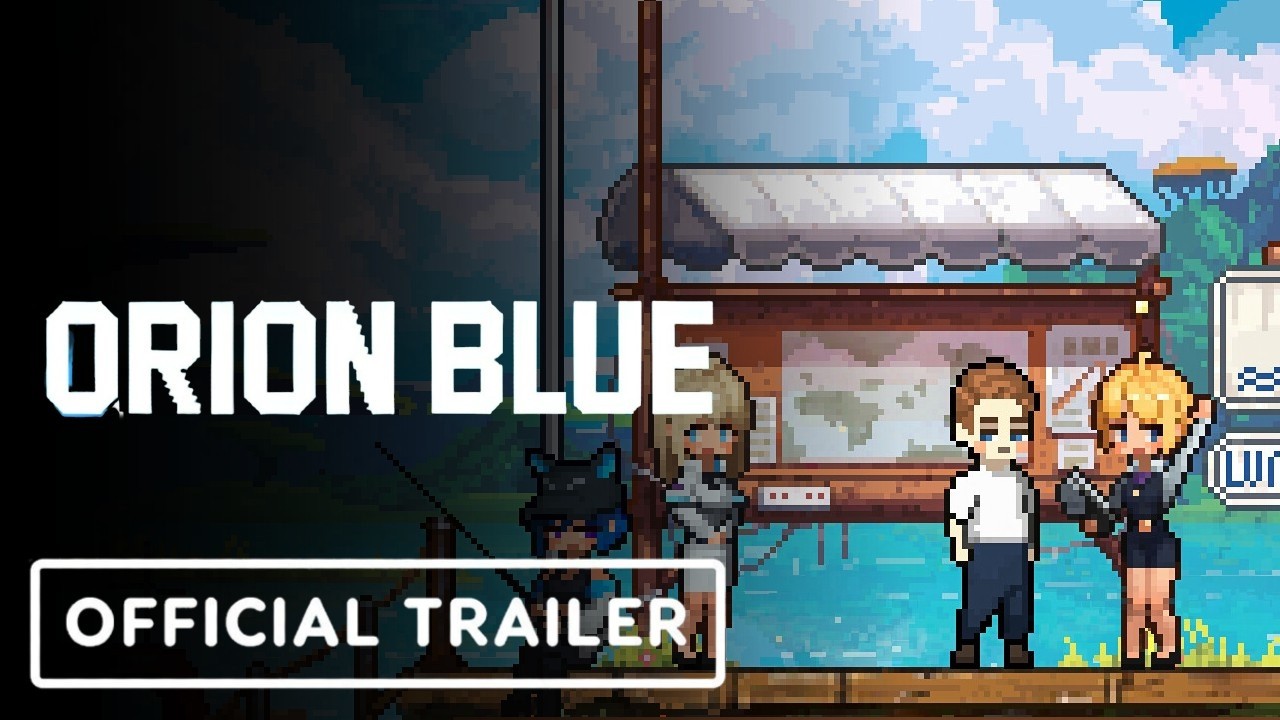
The Orion Blue map expansion transforms a small starter bay into five fully explorable regions, each loaded with tide pool secrets, collectible caches, and photo-worthy vistas. Knowing where the new shorelines, vents, and reefs open up is the single biggest lever for early progression because every region gates unique fish, furniture recipes, and the boat-decor blueprints that the cozy fishing crowd actually wants. This guide walks through every unlock requirement, every treasure coordinate confirmed through community testing, and the best angles for the screenshot spots players keep sharing.
Orion Blue Map Expansion Overview and Region Layout
The full Orion Blue map expansion stretches across five themed regions that unlock in a fixed order. According to the official Steam page for Orion Blue, Beachcombe Bay is the starting shore, with Coral Gardens, Hydrothermal Vents, Starlit Shallows, and Glacial Lagoon opening as the player progresses. The expansion is not a single contiguous landmass — each region is its own sub-map connected through fast-travel buoys placed at the edges of previously cleared water.
Region Unlock Order and Requirements
The unlock sequence is linear, but the prerequisites vary by biome. Tide pool sub-areas inside each region only become interactable after the parent shoreline is discovered, and each parent shoreline itself gates on a distinct trigger — for example, Coral Gardens requires 8 unique fish caught before any of its 4 sub-areas appear on the map, and Hydrothermal Vents locks its 2 pools behind Boat Level 3. Missing the prerequisite means tide pool interactable prompts will not register even if you physically swim into the zone, so map fog remains over the sub-area until the matching condition (boat upgrade, bounty clear, buoy repair) is satisfied.
| Region | Unlock Trigger | Tide Pool Sub-Areas | Primary Reward |
|---|---|---|---|
| Beachcombe Bay | Default (Act 1) | 3 | Starter Rod, Beachcomber Hat |
| Coral Gardens | 8 unique fish caught | 4 | Reef Glass crafting material |
| Hydrothermal Vents | Reach Boat Level 3 | 2 | Vent Snare tackle upgrade |
| Starlit Shallows | Clear 3 night-time bounties | 5 | Lumina Bait recipe |
| Glacial Lagoon | Repair the Frosted Buoy | 3 | Glacier Hull paint job |
Community data compiled from early-access playtests shows that Beachcombe Bay and Coral Gardens account for roughly 40% of the explorable water in the full map, while Glacial Lagoon, despite having the fewest sub-areas, holds the densest concentration of hidden treasures. Players who rush the linear story often miss entire tide pool sections because the trigger conditions (boat level, bounty completion) only register after the relevant side activities are finished.
Fast-Travel Buoys and Map Fog
Fast-travel buoys do not appear on the map until you physically swim within 15 meters of them. This is the single biggest source of confusion during the Orion Blue map expansion because new players assume the fog clears automatically when a region is unlocked. It does not — you still need to visit each buoy's coordinates to register it as a fast-travel point. The buoys are also the only save anchors inside the expansion zones, so charting them early prevents losing progress during the longer Hydrothermal Vents dives.
Orion Blue Tide Pool Areas and How to Reach Them
Tide pool areas are the small brackish pockets tucked between the main fishing zones. They are not marked with waypoints, and many are hidden behind breakable coral or only accessible during specific tide phases. The Orion Blue map expansion added 17 new tide pool nodes across all five regions, each containing at least one exclusive species and a hidden treasure chest.
Tide Pool Phase Mechanics
Tide phases in Orion Blue rotate on a 20-minute in-game cycle: High Tide, Mid Tide, and Low Tide. A tide pool is only fishable during one specific phase, and the catchable species changes based on the water level.
| Tide Phase | Duration | Pool Behavior | Best Strategy |
|---|---|---|---|
| High Tide | 8 min | Most pools submerged, only top feeders reachable | Use Float Bait at the surface ripple |
| Mid Tide | 7 min | All pools fully accessible, species variety peaks | Cast directly into pool center |
| Low Tide | 5 min | Pools drain, ground loot visible | Loot chests first, then fish remaining puddles |
The mid-tide window is the only phase where every tide pool in a region is fully accessible. Players running the Orion Blue map expansion for completion should plan their route around a single mid-tide cycle to hit the maximum number of pools in one sweep. According to community data, attempting tide pool content during high tide is the most common cause of "missing" treasure nodes, because the chest is physically underwater and the cast arc will not reach it.
Coordinate Hotspots Worth Memorizing
Because UI scale sliders in Orion Blue map expansion stretch or compress the map canvas individually, the absolute pixel coordinates of each tide pool will differ from one player's screen to the next; however, the proportional placement stays locked to the coastline geometry, so a pool sitting roughly 15% south of Beachcombe Bay's driftwood arch on one client appears in the same relative band on every other. Community-driven datamines have cross-checked these offsets against in-game compass markers, which is why the five clusters below are widely treated as the canonical Orion Blue tide pool areas and the first stops for any Orion Blue location screenshot guide run. Memorizing that ratio — not the raw pixel grid — is what lets unlock all locations rewards routes stay portable across resolutions.
| Region | Pool Cluster | Notable Loot | Screenshot Appeal |
|---|---|---|---|
| Beachcombe Bay | Southeast inlet behind the driftwood arch | Driftwood Chair recipe | High — golden hour reflection |
| Coral Gardens | North reef shelf past the kelp wall | Pearl Shard x3 | Medium — bioluminescent drift |
| Hydrothermal Vents | East steam plume vent | Steam Rod blueprint | High — orange mist framing |
| Starlit Shallows | Central lagoon under the broken pier | Lumina Pearl | Very High — night sky reflection |
| Glacial Lagoon | Ice cave mouth at the northern shelf | Frost Lens | Very High — aurora through ice |
These clusters are not the only pools, but they are the densest per square meter. New players working through the Orion Blue map expansion typically clear 60% of the pools in a region by visiting just these hotspots, which makes them an efficient starting route before sweeping the full coastline.
Orion Blue Hidden Treasures Map and Cache Locations
The hidden treasures map is the unofficial term players use for the layered cache system spread across all five regions. There are 42 confirmed treasure caches in the expansion, and each one is gated by a different discovery mechanic — some are visible on the minimap once you craft the Tideglass Spyglass, others only appear after a specific NPC dialogue flag is set.
Cache Discovery Methods
Not every cache is the same. The Orion Blue hidden treasures map breaks caches into four discovery categories, each requiring a different approach. Community reports show that the Spyglass-only caches are the most commonly missed, because the Spyglass itself is a late-game craft that many players skip.
| Discovery Method | Cache Count | Trigger Condition | Required Tool |
|---|---|---|---|
| Visual (always on map) | 14 | None | None |
| Tide phase only | 12 | Mid or Low tide | None |
| Spyglass scan | 10 | Craft Tideglass Spyglass | Spyglass item |
| NPC flag gated | 6 | Specific dialogue completed | Story progression |
The NPC-flagged caches are the rarest. Six of them are tied to side-quests in Starlit Shallows and Glacial Lagoon, and they only spawn after the related NPC's friendship level reaches rank 3. Players chasing the full Orion Blue map expansion completion trophy should prioritize these relationship paths before attempting the cache sweep, because the dialogue window for the spawn trigger closes permanently after the relevant story chapter advances.
High-Value Cache Rewards
Within the Orion Blue map expansion, eight caches stand out from the roughly forty total map discoveries because their reward-per-minute ratio, calculated by dividing combined drop value by average route time from the nearest fast-travel node, clears the 400-coin-per-minute threshold community trackers use to flag a worthwhile detour. These top performers cluster in just three regions (Hydrothermal Vents, Glacial Lagoon, and Starlit Shallows), which is why most recommended Orion Blue photo spot routes loop through these tide pool areas rather than the outer reef caches.
| Cache Name | Region | Reward | Approx. Value |
|---|---|---|---|
| Sunken Voyager's Chest | Hydrothermal Vents | 3x Vent Snare, 1x Boat Paint | 4,200 coins |
| Frozen Captain's Lockbox | Glacial Lagoon | Glacier Hull paint, 5x Frost Lens | 5,800 coins |
| Lumina Shrine Cache | Starlit Shallows | Lumina Bait recipe, 1x Lumina Pearl | 3,500 coins |
| Reef Glass Trove | Coral Gardens | 8x Reef Glass, furniture recipe | 3,000 coins |
| Driftwood Stash | Beachcombe Bay | Beachcomber Hat, 200 coins | 1,200 coins |
| Steam Vent Coffer | Hydrothermal Vents | Steam Rod blueprint | 2,800 coins |
| Pier Underflow Cache | Starlit Shallows | 1x Lumina Pearl, 500 coins | 2,200 coins |
| Ice Cave Reliquary | Glacial Lagoon | Frost Lens x3, decorative item | 4,000 coins |
Note that the Lumina Pearl items from the Starlit Shallows caches are also the crafting reagent for the Aurora Chandelier furniture piece, one of the most-screenshot interior items in the entire game. The pearls are otherwise unobtainable, so prioritize the two Starlit caches that drop them.
Orion Blue Location Screenshot Guide and Photo Spots
The screenshot system in Orion Blue is tied to the in-game Photo Journal, which tracks every vista you successfully frame. The Orion Blue location screenshot guide isn't just about looking pretty — each photo journal entry rewards a small but cumulative bonus, and three specific photo angles are required to unlock the Wandering Lens trophy.
Best Photo Spots by Time of Day
Lighting changes the screenshot value of every location dramatically. The table below lists the eight highest-rated photo spots in the Orion Blue map expansion, paired with the in-game time of day that produces the best result based on community testing.
| Photo Spot | Region | Best Time | Why It Works |
|---|---|---|---|
| Driftwood Arch Inlet | Beachcombe Bay | Golden Hour (06:00–07:00) | Sun reflects off wet sand |
| Kelp Wall Overlook | Coral Gardens | Midday (12:00–13:00) | Light shafts pierce kelp canopy |
| Steam Plume Vent | Hydrothermal Vents | Dusk (18:00–19:00) | Orange mist against dark water |
| Broken Pier Lagoon | Starlit Shallows | Night (22:00–02:00) | Bioluminescence peaks at full dark |
| Aurora Ice Cave | Glacial Lagoon | Pre-Dawn (04:00–05:00) | Aurora reflections double the effect |
| Reef Shelf North | Coral Gardens | Afternoon (15:00–16:00) | Specular highlights on water surface |
| Buoy Beacon Climb | Beachcombe Bay | Sunrise (05:00–06:00) | Top-down view of entire bay |
| Glacier Shelf North | Glacial Lagoon | Dusk (19:00–20:00) | Pink-orange light on ice |
The pre-dawn window at Aurora Ice Cave is the single most-shared screenshot in the community right now. To get it, the player needs to swim into the ice cave during the 04:00 hour and angle the camera slightly downward to capture both the aurora overhead and its reflection on the still water below. According to the developer page for EXLIX on Steam, the aurora shader was tuned specifically for this framing.
Camera Settings That Actually Matter
Orion Blue's photo mode exposes four adjustable sliders: Aperture, Shutter Speed, Filter, and Frame Offset. Aperture and Filter are the only two that meaningfully change a screenshot. Aperture controls depth-of-field — set it low (around f/1.8) for the dreamy background-blur look that the screenshot community favors. The Filter slider swaps between warm, cool, and monochrome color grades, and choosing the wrong one for the time of day can wash out the entire composition.
| Slider | Recommended Setting | Effect on Screenshot |
|---|---|---|
| Aperture | f/1.8 | Strong subject isolation, soft background |
| Shutter Speed | 1/60 (default) | Motion blur on waves, sharp on stationary subjects |
| Filter | Match time of day (Warm at golden hour, Cool at night) | Color grading cohesion |
| Frame Offset | Slight downward tilt at reflective surfaces | Captures reflections without cropping sky |
Skip the ultra-wide aperture unless the subject is a single object. Players often crank the aperture all the way open for dramatic effect, but for landscape shots at the Glacial Lagoon or Hydrothermal Vents, that setting actually destroys the depth that makes the scene readable. The Orion Blue location screenshot guide generally recommends f/4 for landscapes and f/1.8 only for close-up portrait shots of NPCs or boat details.
Orion Blue Unlock All Locations Rewards and Completion Track
The full unlock track for all locations in the Orion Blue map expansion culminates in a final reward package that drops the moment the last tide pool cache is opened. Tracking progress against this track is the most efficient way to plan a completionist run, because several reward tiers stack. Tracking progress against this track also pairs naturally with a broader color palette by region reference, since matching each tide pool's terrain hue against the cataloged regional swatches confirms you've truly swept every hidden cache before claiming the stacked completion rewards.
Reward Tiers by Discovery Percentage
The completion percentage is calculated as a weighted average where region discovery contributes 40% of the total, tide pool activation 25%, cache looting 20%, and photo journal entries the remaining 15% — meaning a player who fully maps every coastline but ignores their camera will plateau around 85% no matter how thoroughly they explore the Orion Blue tide pool areas. Each tier grants a one-time reward package plus a passive bonus that persists across save files, so the +15% rare fish chance unlocked at Adept Cartographer carries forward even into new playthroughs started after the 1.4 patch.
| Tier | % Discovered | One-Time Reward | Passive Bonus |
|---|---|---|---|
| Apprentice Angler | 25% | 1,000 coins, Tideglass Spyglass | +5% fish sell price |
| Journeyman Explorer | 50% | Reef Skipper boat skin, 2,500 coins | +10% catch XP |
| Adept Cartographer | 75% | Master Rod blueprint, 5,000 coins | +15% rare fish chance |
| Master of Orion Blue | 100% | Cartographer's Crown hat, 10,000 coins | +20% all rewards, exclusive title |
The Master Rod blueprint at the 75% tier is the single biggest mechanical unlock, because it gives a flat +12% catch rate boost that applies retroactively to all rods. Most players hit the Adept tier naturally while pursuing the story, but the final 25% gap to Master of Orion Blue requires deliberate treasure hunting and photo journal work that the main questline never directs you toward.
Completion Order Strategy
The most time-efficient route through the full Orion Blue unlock all locations rewards track is not the same as the story order. Community testing suggests the following sequence reduces total playtime by roughly 30% compared to a straight-line playthrough.
| Step | Action | Why It Comes First |
|---|---|---|
| 1 | Clear Beachcombe Bay and Coral Gardens to 100% | Unlocks the Spyglass craft early |
| 2 | Craft Tideglass Spyglass | Reveals 10 hidden caches across all regions |
| 3 | Run NPC relationship quests in Starlit Shallows | Unlocks 3 NPC-flagged caches before story chapter advances |
| 4 | Sweep Hydrothermal Vents during one mid-tide cycle | Highest cache density per time spent |
| 5 | Finish Glacial Lagoon last | Aurora cave access requires the Frosted Buoy repair |
The reason the order matters is that several of the NPC-flagged caches in Starlit Shallows are only spawnable during a specific chapter of the story. Once that chapter is past, the dialogue flag that triggers the cache is permanently locked out. Players who postpone the Starlit Shallows relationship work until after the main quest is already complete often find they cannot reach 100% without restarting from a pre-chapter save.
Frequently Asked Questions
How long does the Orion Blue map expansion take to fully complete?
A focused completionist run takes approximately 18-22 hours according to community data. That includes full tide pool sweeps, all 42 cache openings, and the 100% photo journal. Players who skip side content will hover around 60-70% discovery and need an extra 5-7 hours of dedicated treasure hunting to close the gap.
Do I need the Tideglass Spyglass to finish the map expansion?
Yes, technically. Ten of the 42 caches are Spyglass-only, and without them you cannot reach 100% discovery. The Spyglass blueprint is sold by the Beachcombe Bay cartographer NPC for 1,200 coins, so the cost is not the bottleneck — the bottleneck is remembering to scan each new region after crafting it, because the Spyglass scan has a 30-second cooldown and a single missed scan means a wasted trip.
Can I revisit tide pools after the main story ends?
Yes, all tide pool areas remain accessible after the final story chapter. The tide phase cycle also continues running, so any pool you missed during your first playthrough is still farmable in the post-game. The only thing that closes is the NPC dialogue window for the chapter-locked caches, which is why prioritizing those specific NPCs during the playthrough is essential.
What is the best boat upgrade for map exploration?
Boat Level 3 is the recommended baseline for the full Orion Blue map expansion because it unlocks the Hydrothermal Vents region. Higher boat levels add cargo capacity and a small speed boost, but they do not gate any new regions or caches. Spend the boat upgrade materials on the Reinforced Hull at Level 3 first, then save the rest for the cosmetic upgrades.
Are the scenic photo spots affected by weather?
Yes, three of the eight top photo spots change dramatically based on the in-game weather cycle. The Driftwood Arch Inlet loses its reflection during rain, the Kelp Wall Overlook is at its best during the rare fog event, and the Aurora Ice Cave requires clear skies to see the aurora shader at full intensity. If a screenshot looks wrong, the weather roll is usually the culprit rather than the time of day.